

Bike Repair Instructions
The number of public-use bicycle repair stations in North America has exploded in recent years.
Bike repair stands, air pumps and other forms of infrastructure have matured and become commonplace faster than many people would have expected in an automobile-dominated transportation paradigm.
Now that more people have access to the tools required for basic bicycle maintenance, we think it's time for a little refresher on what these tools are and what they're used for.
How to Use Repair Stand Tools
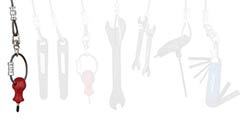
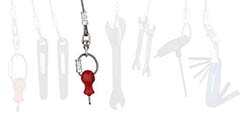
Phillips Head Screwdriver
Used for:
- Adjusting the high/low range of the front or rear derailleur
- Adjusting the resistance arm on V-brakes
-
Tightening accessories mounted to your bike using Phillips hardware: light brackets, bells, etc.
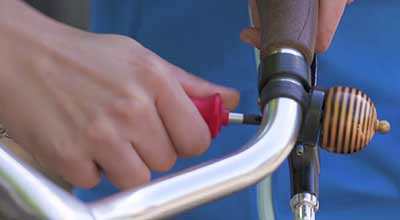
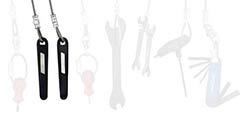
Tire Levers
- There's only one intended use for these tools and that is to help remove the tire from the rim for when you need to change/repair a flat inner tube.
- For help changing a flat, jump to Tube Replacement Instructions.
Flat Head Screwdriver
- Most hardware on bikes that requires use of a screwdriver will be for a Phillips, but occasionally a small Flat Head Screwdriver will be more effective.
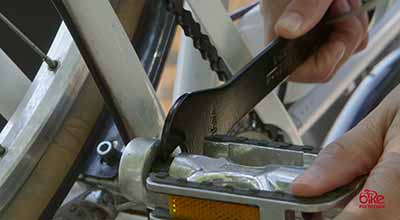
Headset/Pedal Wrench
- 32mm end is for adjusting the lock nut or adjustable race of a threaded headset (more common on older road and city bikes).
- 15mm end is for tightening or removing pedals from the crank arm that use a 15mm nut.
- Pro Tip: Pedals always tighten by turning the wrench toward the front of the bike; i.e. righty-tighty/lefty-loosey for the drive side, while the non-drive side is the opposite.

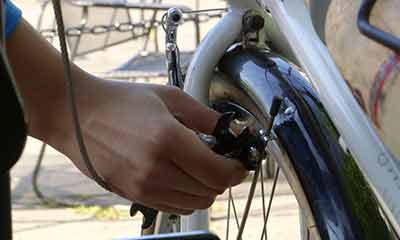
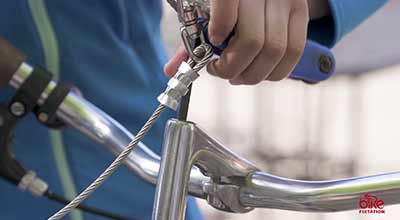
8/10 + 9/11 mm Cone Wrenches
-
Brake adjustments and minor shifting tweaks will benefit from these combo wrenches.
T25 Torx Wrench
- Use this wrench to tighten disc brake rotor bolts (used on most modern bikes).
- If you’ve got some high-zoot components on you bike, you may need the T25 to snug up your handlebar stems, adjust the stem or seat clamp.
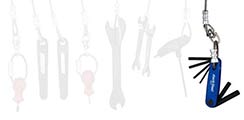
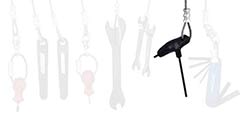
Folding Hex Wrenches
-
Nearly every bicycle in use today will require certain hex wrenches to adjust handlebars, stems, and saddles, along with many axle systems.
Tire Inflation Instructions
Manual Pump
-
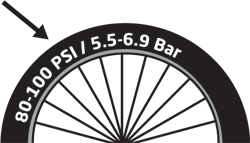
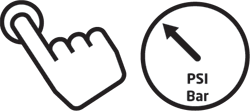
Read the pressure range from the side of the tire.
-
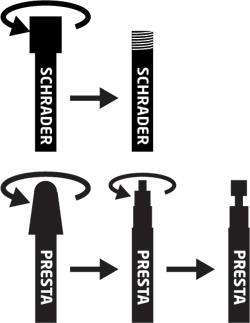
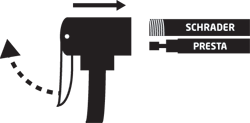
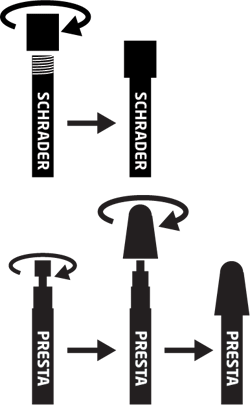
Remove the cap from the tire valve. On Presta valves, loosen the tip of the valve.
-
Connect the tire valve to the pump nozzle and flip the lever up.
-
Using both hands, move the pump handle up and down. Stop when the desired pressure is reached.
-
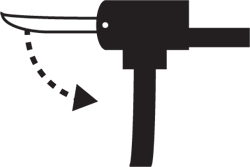
Flip down nozzle lever and remove the nozzle from the tire.
-
Replace the cap on the tire valve. On Presta valves, re-tighten the tip of the valve first.
-
Happy riding!
Electric Pump
-
Read the pressure range from the side of the tire.
-
Remove the cap from the tire valve. On Presta valves, loosen the tip of the valve.
-
Connect the tire valve to the pump nozzle and flip the lever up.
-
Press and hold the button until the desired pressure is reached
-
Flip down nozzle lever and remove the nozzle from the tire.
-
Replace the cap on the tire valve. On Presta valves, re-tighten the tip of the valve first.
- Happy riding!
Tube Replacement Instructions
- Remove the wheel from your bike.
- Inspect the outside of the tire for glass or anything else poking out. Remove if found.
- Deflate the tire completely by letting the air out of the tube.
- Opposite the valve, wedge two tire levers (not a screwdriver!), next to each other, between the tube and the rim.
- Hold one tire lever in place and slowly work the other lever away from you, prying one side of the tire off of the rim. The edge of the tire you are prying against is called the bead.
- When one side is removed, remove the tire levers and pull the other bead off the rim.
- Inspect the inside of the tire for glass or anything else poking out. If there is a large hole in the tire, such that the inner tube can poke through, you may need to apply a temporary tire boot, and consider replacing the tire.
- Inspect the band of rubber, plastic, or cloth tape on the rim. Make sure it is covering the spoke holes on the rim.
- Put one tire bead back on to the rim.
- Inflate the new or patched tube a bit. This will make the next steps easier.
- Put the valve through the proper hole on the rim.
- Slowly work the tube inside the tire and on to the rim.
- Put the other bead of the tire back on the rim. If possible, do not use tire levers to do this. Use your hands instead.
- Once both beads are on the tire, using your hands, pry between the rim and the tire and make sure the tube is not sticking out anywhere. Do this on both sides of the tire.
- Inflate the tire to the pressure range recommended.
- Re-install the wheel onto your bike.